2 0 1 7 - 0 6 - 0 6
[Warfork Fantasy Battles]
Town House WD131
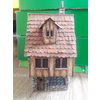
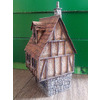
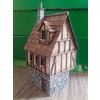
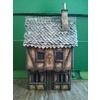
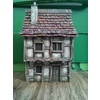
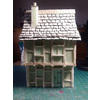
Houses are done.
The first step in adding moss and overgrowth, was to paint all the sand that got glued to where it wasn't intended to in green, washed brown, and drybrushed in two lighter shades.
I then used Woodland Scenics
- coarse turf burnt grass
- coarse turf medium green
- blended turf green blend
I glued on the coarse turf, then covered the whole building side in the green blend, to cover all the gaps between the coarse turf and any areas where the glue was applied to sparsely for the coarse turf to adhere.
I think there are a couple spots where I overdid the effect, but all in all I am happy with the result.
Project done :-)
Published 2017-06-06 10:00:48
28mm | Terrain | Warfork Fantasy Battles
All posts for this project: newest first | oldest first.
2 0 1 7 - 0 6 - 0 5
[Warfork Fantasy Battles]
Town House WD131
The painting on the fourth house is done. For the stones I used 3 different colours (grey, grey green, light brown), but mixed them as well, for more variety.
They were then drybrushed in a light grey and all the seams blackwashed. The upper walls were painted in sand colours, the timbers a dark brown, the shingles bordeaux red; all this followed by several washes.
All the windows on the buildings so far were painted just black to keep in line with the style of the old White Dwarf buildings. This looked awful with the panneled shop window, so with that one I used blues to represent glass.
Finally, the shop sign had the word book written on it.
As with the first, second and third building, I will apply some flock to represent moss, apart from that the model is done.
Published 2017-06-05 10:42:21
28mm | Terrain | Warfork Fantasy Battles
All posts for this project: newest first | oldest first.
2 0 1 7 - 0 5 - 2 8
[Warfork Fantasy Battles]
Town House WD131
The painting on the third house is done. The timbers where painted a dark reddish brown. The walls where painted in brown. The roof was painted anthracite grey.
The walls were then overbrushed in brown yellow.
The roof was washed black, drybrushed in the basecolour. Individual shingles were then picked out in umber green and brown washes.
Finally, the roof was drybrushed in the base colour highlighted with white. The walls where drybrushed in ivory, then several washes were applied to walls and timbers.
As with the first and second buildings, I will apply some flock to represent moss, apart from that the model is done.
Published 2017-05-28 09:24:19
28mm | Terrain | Warfork Fantasy Battles
All posts for this project: newest first | oldest first.
2 0 1 7 - 0 5 - 2 6
[Warfork Fantasy Battles]
Town House WD131
The painting on the second house is done. The timbers where painted a dark brown. The walls where painted in anthracite grey. The roof was painted black.
The roof was then overbrushed in dark red, single shingles picked out in lighter red and a few in light red mixed with orange.
The walls where stippled towards the center with umber green, then more centered white. The timber was drybrushed in two shades of grey. I then applied some washes; finally the roof was drybrushed from bottom to top lightly in ivory.
As with the first, I will apply some flock to represent moss, apart from that the model is done.
Published 2017-05-26 22:30:21
28mm | Terrain | Warfork Fantasy Battles
All posts for this project: newest first | oldest first.
2 0 1 7 - 0 5 - 2 3
[Warfork Fantasy Battles]
Town House WD131
The painting on the first house is done. I started by painting the timbers, liberally overspilling the paint to cover all the gaps between timbering and the house. For this I mixed burnt umber with black. The roof was painted black.
I then painted the walls in ochre, the windows in black.
The roof was drybrushed in blues in several stages. Some shingles were left darker, others were hightlighted to quite a light shade. I then used different brown, black and blue washes on different shingles. Then the whole models was drybrushed in ivory; walls, timbering and shingles.
To tone down the stark drybrush effect, I applied brown, green and black washes (all from the Vallejo model range) to the model, and applied a final drybrush of very light white to the center areas of the walls.
After all buildings have been painted, I will apply some flock to represent moss, apart from that the model is done.
Published 2017-05-23 11:25:48
28mm | Terrain | Warfork Fantasy Battles
All posts for this project: newest first | oldest first.
2 0 1 7 - 0 5 - 0 7
[Warfork Fantasy Battles]
Town House WD131
The last house is done.
.
I still had to do the business sign on the first house; I decided for it to be a book shop. So I carved an open book from balsa wood and created a chain it could dangle from from copper wire.
The extra rings I used to embellish the door knobs on some of the buildings.
.
Here are all four together:
Painting pending - let's crack on, yeah?
Published 2017-05-07 01:31:47
28mm | Terrain | Warfork Fantasy Battles
All posts for this project: newest first | oldest first.
2 0 1 7 - 0 4 - 3 0
[Warfork Fantasy Battles]
Town House WD131
Third house is finished. The major difference to the other two houses is the curved roof. I made a template from cardboad to get the curve as equal as possible on both sides.
I used 4mm wide beams to make the main 'box' of the building, then used smaller 2mm for the framing in between. The corner beams (4mm x 4mm) had a 2mm x 2mm corner cut out to fit snuggly to the building.
The door was again carved into the foam.
The inner removable roof was build from foam and card, the ridge is the other half used on the first house.
To get an irregular not flat roof, I did not use card to glue the shingles to, but a piece of tissue paper drenched in watered down PVA.
For another shingle form I used triangle pointed ones on this house.
Out of a whim I decided to have an overhang on the roof that grows towards the ridge - not sure if I like that or not.
Published 2017-04-30 11:01:06
28mm | Terrain | Warfork Fantasy Battles
All posts for this project: newest first | oldest first.
2 0 1 7 - 0 4 - 1 6
[Warfork Fantasy Battles]
Town House WD131
Second house is finished. This one is a nearly 100% copy of the house from the article. The angle of the roofs I cut is 60°, the plan in the article has 54°, so I first made a template from cardboard and cut down the side walls.
For this house, I carved the door directly into the foam.
Besides not having a stone ground floor, this bulding was done like the first - balsa wood framing, bird cage sand for the texturing. The shingles on this one are rectangular and cut from thicker card.
One problem I encountered, which I don't know how to solve yet, is that the glue on the roof warped it - the roof fit the walls perfectly before gluing the shingles to it... I will probably hide it with moss or a row of smaller shingles glued in one row parallel to the wall...
Published 2017-04-16 10:59:24
28mm | Terrain | Warfork Fantasy Battles
All posts for this project: newest first | oldest first.
2 0 1 7 - 0 4 - 0 8
[Warfork Fantasy Battles]
Town House WD131
I cut the doors from balsa wood, cut planks into them, then added fixtures cut from card.
The sectioning of the large front window was done with thinly cut strips of balsa.
I added a bit of spackle to some of the stones. On the one hand this covers where the foam pieces obviously meet, on the other hand this gives some more 3d effect to the wall.
I started to give structure to the walls using the same spackle, but this was hard to apply, so only the gables have it. For the rest of the walls I used PVA and sprinkled sand on.
I still want to carve a sign symbolizing the wares sold here, which will dangle from a chain on the outside, but I am not sure yet which it will be.
Apart from that sign, construction is done :-)
Published 2017-04-08 09:53:41
28mm | Terrain | Warfork Fantasy Battles
All posts for this project: newest first | oldest first.
2 0 1 7 - 0 4 - 0 5
[Warfork Fantasy Battles]
Town House WD131
Some years ago, I saw this nice scissors with a wave form in a store. "You will never need that!" I was told by her who must be obeyed - ha! Finally I proved here wrong :-)
The merchant has some nice rounded shingles on his roof. To place them, I drew lines on the roof - which again would have been easier before gluing the card to the walls...
I added two gables as well and shingled the roof(s).
Published 2017-04-05 10:00:02
28mm | Terrain | Warfork Fantasy Battles
All posts for this project: newest first | oldest first.


