2 0 1 4 - 0 8 - 1 0
[6mm]
A gaming board in a weekend
The buildings were finished by painting the windows Extra Dark Green and the doors and hatches in German Grey.
The smaller hill I cut into two:
I also removed one arm from the river:
To finish the hills, I added static grass:
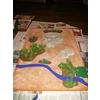
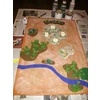
It is now 11:43 pm and the board is ready for gaming (well, except the varnish drying on the hills and buildings):
Mission accomplished :-)
One gaming board done in one weekend, and that although we played BattleTech yesterday and had visitors with us today.
Published 2014-08-10 23:43:00
6mm | SiFi | Space Marines | Stargrunt 40.000 - Rogue Rules | Terrain
All posts for this project: newest first | oldest first.
[6mm]
A gaming board in a weekend
I cut the felt and placed it on the board together with the other pieces. The island in the river was cut out of a whim.
I still need to add some static grass and paint the windows, doors and hatches of the buildings.
The smaller hill is too big, it does not allow the Orks to advance on the Imperial position from behind it too much - and over it puts them in the line of fire. I think I will cut it in half, allowing more manoevering space behind it.
I am also not sure yet if I will leave the river with the island... at the moment, having to cross two arms is slowing them Orks down further... Either I will cut the left one away or I need to paint more items on the Orks red... because Woz red wunz go fasta!
Published 2014-08-10 20:04:00
6mm | SiFi | Space Marines | Stargrunt 40.000 - Rogue Rules | Terrain
All posts for this project: newest first | oldest first.
[6mm]
A gaming board in a weekend
The buildings were base coated in grey, then the lower half was sprayed white in preparation of the yellow coat that followed. After the yellow was dry, I placed a 1mm tape strip around the building, and then sprayed a dark brown coat over it. This was then covered by a 2mm tape strip, placed (theoretically) centrally on the 1mm strip. Then the building was sprayed in a sand colour, and received two drybrushs.
Then it was time to remove the tape strips... drumroll...
Well, the two buildings on the left turned out as intended, with the two buildings on the left I did not place the strips correctly... :-(
The board was drybrushed in the base colour, then in sand and finally in white.
The hills were painted in anthracite grey, then drybrushed in a brown grey and finally in white. The sand areas were painted the same way as the board.
Published 2014-08-10 16:49:00
6mm | Airbrush | SiFi | Space Marines | Stargrunt 40.000 - Rogue Rules | Terrain
All posts for this project: newest first | oldest first.
[6mm]
A gaming board in a weekend
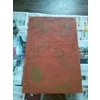
The board received a wash of dark brown, then green in patches.
The hill the Marines need to defend is occupied by 4 buildings the Squats need to blow up. I placed them in a way, that the engineers can move from building to building by using two actions, so one whole turn. They can also chance however, making a combat move (rolling 2D4) and hope to cover the distance in one action, leaving them one action to start preparing the charges.
The hills all consist of three layers of cork floor tiles glued together. I then used pliers to break of the edges, thus creating a rough and uneven cliff face.
Finally, the hills got some areas coverd in sand as well. On the large hill, the sand forms right angles around at least one corner of each building, so that I know exactly where to place them for each game.
Published 2014-08-10 12:08:00
6mm | SiFi | Space Marines | Stargrunt 40.000 - Rogue Rules | Terrain
All posts for this project: newest first | oldest first.
2 0 1 4 - 0 8 - 0 9
[6mm]
A gaming board in a weekend
I painted these models quite some time ago, but so far never used them in a game.
Now a new colleague who learnt about my hobby asked for a game during lunch break, so I thought again of these small models, which would need a smaller game board.
Only problem: I neither have a board nor any terrain...
The above models I painted according to the scenario description of Ork Hill. So it will be this scenario I have time to build terrain for this weekend... You grow with your challenges...
Here you can see my interpretation of the terrain description from the scenario:
So I need two hills, four buildings and the board. The woods will be brown felt areas with aquarium plants I already have (probably too large, but ready) and for the river/marsh I will use blue felt. So I hope the building and painting can be accomplished this weekend.
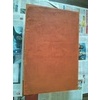
First, the board. It is 50751.2cm MDF. It got coated with PVA and sprinkled with bird cage sand. I then painted it in orange brown.
The buildings I designed on the computer, printed them and glued the prints to corrugated card board. I the cut the windows before cutting the walls. For gluing, I used Lego blocks to get nice 90° corners. There is a floor, inner walls that close the windows from the inside and serve as pillars for the roof and finally the roof. As I don't like 'unlogical' terrain, I needed an access to the roof. So I cut squares from card board, cut away the edges and glued them onto the roof as hatches. When dry, I covered the buildings in ready made wall spackle.
Published 2014-08-09 00:22:00
6mm | Games Workshop | Ground Zero Games | Orks | SiFi | Space Marines | Stargrunt 40.000 - Rogue Rules | Terrain
All posts for this project: newest first | oldest first.


