2 0 1 7 - 1 2 - 2 3
[Song of Fork and Heroes]
Mythical Agyptian Scatter Terrain
I basecoated the sand in ochre brown, the structures in sand.
The base was then drybrushed in ochre.
This was followed by a drybrush of white over everything.
I then painted the skulls in white, the beetles in black with dark grey highlights, and the snakes and scorpions using the same colours as for the giant scorpion.
Published 2017-12-23 11:45:20
28mm | Agyptians | Green Stuff World | Song of Fork and Heroes | Terrain
All posts for this project: newest first | oldest first.
2 0 1 7 - 1 2 - 1 2
[Song of Fork and Heroes]
Mythical Agyptian Scatter Terrain
I sanded the bases and sealed them with watered down PVA.
Published 2017-12-12 09:54:54
28mm | Agyptians | Green Stuff World | Song of Fork and Heroes | Terrain
All posts for this project: newest first | oldest first.
[Song of Fork and Heroes]
Mythical Agyptian Terrain
The bases have been sanded and then sealed with watered down PVA. As my castings are not really perfect, there were some gaps here and there and a few air bubbles. To cover these, I put some filler into a jar and watered it down to a paste. This I then applied to cover the gaps, and then stippled the surface to try and blend it in to Bruce's blasted sand surface.
Published 2017-12-12 09:54:34
28mm | Agyptians | Hirst Arts | Song of Fork and Heroes | Terrain
All posts for this project: newest first | oldest first.
2 0 1 7 - 1 2 - 1 1
[Song of Fork and Heroes]
Mythical Agyptian Scatter Terrain
While shopping for some supplies with Green Stuff World, I discovered their Egyptian Ruins set and added it to my purchase. I based the pieces on the same floor tiles as the other terrain, blended them in with filler, and will now add sand.
Published 2017-12-11 08:28:28
28mm | Agyptians | Green Stuff World | Song of Fork and Heroes | Terrain
All posts for this project: newest first | oldest first.
[Song of Fork and Heroes]
Mythical Agyptian Terrain
Flat as can be! Once more it showed that keeping 'trash' is good for Terrain building :-)
In addition to the sphinxes, I built two moniliths and some pillars. The bases of the pillars allow for placing two pieces adjacent, and then placing an additional loose block connecting them.
Published 2017-12-11 08:18:40
28mm | Agyptians | Hirst Arts | Song of Fork and Heroes | Terrain
All posts for this project: newest first | oldest first.
2 0 1 7 - 1 2 - 0 3
[Song of Fork and Heroes]
Mythical Agyptian Terrain
Over the last months I cast Hirst Arts molds on and off, then and now. Among them are also Agyptian molds which I intended to use for the games with my Agyptians. Here is the outcome of the Temple entrance mold #98.
I started with the sphinx statues by gluing pairs of blocks using Legos to align them.
The pairs where then glued into the complete sphinx statues, again using Legos for the correct alignment.
Two years ago, our lavatory was redecorated, which resulted in off-cuts from the floor tiles. Which I of course kept, you never know... (my wife was not immediately convinced back then as you might imagine). Now I remembered them, and thought they might be good basing material.
The bottom is plastic with a grid, which makes the bottom somewhat rough. I hope this will help prevent the terrain items sliding around on the table.
Here is my first test piece. I beveled the edges and kept about 1cm flat around the base of the statue.
I now applied PVA glue and grit, currently the sealing coat is drying. So far it looks good concerning the material's warping vulnerability. If it is still flat tomorrow, this will be my basing material for this project.
Published 2017-12-03 10:18:02
28mm | Agyptians | Hirst Arts | Song of Fork and Heroes | Terrain
All posts for this project: newest first | oldest first.
2 0 1 7 - 0 6 - 0 6
[Warfork Fantasy Battles]
Town House WD131
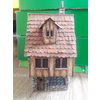
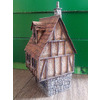
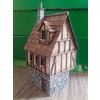
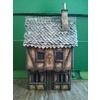
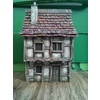
Houses are done.
The first step in adding moss and overgrowth, was to paint all the sand that got glued to where it wasn't intended to in green, washed brown, and drybrushed in two lighter shades.
I then used Woodland Scenics
- coarse turf burnt grass
- coarse turf medium green
- blended turf green blend
I glued on the coarse turf, then covered the whole building side in the green blend, to cover all the gaps between the coarse turf and any areas where the glue was applied to sparsely for the coarse turf to adhere.
I think there are a couple spots where I overdid the effect, but all in all I am happy with the result.
Project done :-)
Published 2017-06-06 10:00:48
28mm | Terrain | Warfork Fantasy Battles
All posts for this project: newest first | oldest first.
2 0 1 7 - 0 6 - 0 5
[Warfork Fantasy Battles]
Town House WD131
The painting on the fourth house is done. For the stones I used 3 different colours (grey, grey green, light brown), but mixed them as well, for more variety.
They were then drybrushed in a light grey and all the seams blackwashed. The upper walls were painted in sand colours, the timbers a dark brown, the shingles bordeaux red; all this followed by several washes.
All the windows on the buildings so far were painted just black to keep in line with the style of the old White Dwarf buildings. This looked awful with the panneled shop window, so with that one I used blues to represent glass.
Finally, the shop sign had the word book written on it.
As with the first, second and third building, I will apply some flock to represent moss, apart from that the model is done.
Published 2017-06-05 10:42:21
28mm | Terrain | Warfork Fantasy Battles
All posts for this project: newest first | oldest first.
2 0 1 7 - 0 5 - 2 8
[Warfork Fantasy Battles]
Town House WD131
The painting on the third house is done. The timbers where painted a dark reddish brown. The walls where painted in brown. The roof was painted anthracite grey.
The walls were then overbrushed in brown yellow.
The roof was washed black, drybrushed in the basecolour. Individual shingles were then picked out in umber green and brown washes.
Finally, the roof was drybrushed in the base colour highlighted with white. The walls where drybrushed in ivory, then several washes were applied to walls and timbers.
As with the first and second buildings, I will apply some flock to represent moss, apart from that the model is done.
Published 2017-05-28 09:24:19
28mm | Terrain | Warfork Fantasy Battles
All posts for this project: newest first | oldest first.
2 0 1 7 - 0 5 - 2 6
[Warfork Fantasy Battles]
Town House WD131
The painting on the second house is done. The timbers where painted a dark brown. The walls where painted in anthracite grey. The roof was painted black.
The roof was then overbrushed in dark red, single shingles picked out in lighter red and a few in light red mixed with orange.
The walls where stippled towards the center with umber green, then more centered white. The timber was drybrushed in two shades of grey. I then applied some washes; finally the roof was drybrushed from bottom to top lightly in ivory.
As with the first, I will apply some flock to represent moss, apart from that the model is done.
Published 2017-05-26 22:30:21
28mm | Terrain | Warfork Fantasy Battles
All posts for this project: newest first | oldest first.


