2 0 1 4 - 0 8 - 2 3
[15mm IABSM]
South of Cherbourgh
I painted all the wooden parts, spades and grenades in 70.876 Brown Sand, rifles in 70.940 Saddle Brown.
Next step is painting the metal parts.
Published 2014-08-23 21:48:00
15mm | 1940's | IABSM3 | Peter Pig Miniatures | Too Fat Lardies | Wehrmacht | WWII
All posts for this project: newest first | oldest first.
[15mm IABSM]
South of Cherbourgh
I painted the boots and the gaiters on all the models. For the boots I went roughly 50/50 with 70.994 Dark Grey and 70.879 Green Brown. The gaiters were also Field Grey according to the Osprey book I use as a reference, but that was not really visible on the models, so I went for 70.821 German Camo Beige.
Published 2014-08-23 16:59:00
15mm | 1940's | IABSM3 | Peter Pig Miniatures | Too Fat Lardies | Wehrmacht | WWII
All posts for this project: newest first | oldest first.
2 0 1 4 - 0 8 - 1 7
[15mm IABSM]
South of Cherbourgh
After some while another update. It is not that I did not continue on the models, it is just the fact, that with the Wehrmacht models every piece of equipment has another color... which is time consuming.
Here you can see the finished Zeltbahnen.
For all the leather straps and pouches, I first tried a dark grey (model on the right), but this is hardly discernible this close, there is no difference to the uniform from further away. So I went with black (left model).
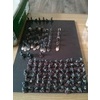
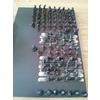
This is the current status of all models: bread bag, canteen, gas mask/blanket canister, Zeltbahn, grenades, spades and mess kit painted, including all the straps. The wooden part of the Stielhandgranaten and spades are still missing.
Published 2014-08-17 23:42:00
15mm | 1940's | IABSM3 | Peter Pig Miniatures | Too Fat Lardies | Wehrmacht | WWII
All posts for this project: newest first | oldest first.
2 0 1 4 - 0 7 - 2 8
[15mm IABSM]
South of Cherbourgh
I started with the Splinter pattern, by painting brown continuous shapes with as much edges as opposed to rounded with Vallejo 70.846 Managing.
Published 2014-07-28 23:04:00
15mm | 1940's | IABSM3 | Peter Pig Miniatures | Too Fat Lardies | Wehrmacht | WWII
All posts for this project: newest first | oldest first.
2 0 1 4 - 0 7 - 2 7
[15mm IABSM]
South of Cherbourgh
I painted the base of the German models in the basic brown colour I use on all my models. Usually I paint the base last, but I often smear paint on the boots of the minis, so I thought I would try out the reverse way; first paint the base, then carefully paint the boots. You can also see the models here on the mdf board covered with magnetic basing material which the washers adhere to. This board will then be glued into a cut down copy paper card box like the rest of my miniatures are stored in.
The models' unifroms were then drybrushed. Considering the fact that German uniform manufacturing was suffering more and more from shortages which resulted in quite different batches of uniforms towards the end of the war both in cloth and colour, I tried to replicate this with my models. I used three different colour mixes for drybrushing:
- 1/2 Vallejo 70.830 German Fieldgrey WWII + 1/2 Vallejo 70.885 Pastel Green
- 2/5 Vallejo 70.830 German Fieldgrey WWII + 2/5 Vallejo 70.920 German Uniform + 1/5 Vallejo 70.815 Basic Skintone
- 1/2 Vallejo 70.830 German Fieldgrey WWII + 1/2 Vallejo 70.919 Iraqui Sand
Well, I could have saved the effort. While the colours looked different in my painting pallette, the models in the end look all the same, especially when seen from a tabletop distance. Can you spot any differences?
I probably should have used different base colours with the same drybrush instead of the other way round.
Next, I started to work on the models wearing Zeltbahnen, so far only the base colour (Vallejo 70.885 Pastel Green) has been applied. I hope I will get the camouflage scheme to look right...
Published 2014-07-27 23:23:00
15mm | 1940's | IABSM3 | Peter Pig Miniatures | Too Fat Lardies | Wehrmacht | WWII
All posts for this project: newest first | oldest first.
2 0 1 4 - 0 7 - 2 0
[15mm IABSM]
South of Cherbourgh
The Wehrmacht troops were first given a basecoat with Vallejo Primer Black Acrylic-Polyurethane, then given a spray from ~40°+ with Valejo German Fieldgrey WWII. The angle also created the first shading, by leavig the downward areas black.
Published 2014-07-20 22:40:00
15mm | 1940's | Airbrush | IABSM3 | Peter Pig Miniatures | Too Fat Lardies | Wehrmacht | WWII
All posts for this project: newest first | oldest first.
2 0 1 4 - 0 7 - 1 5
[15mm IABSM]
South of Cherbourgh
All the single based Americans are ready based, the other models glued for painting.
Published 2014-07-15 23:51:00
15mm | 1940's | IABSM3 | Peter Pig Miniatures | Too Fat Lardies | US Army | WWII
All posts for this project: newest first | oldest first.
2 0 1 4 - 0 7 - 1 3
[15mm IABSM]
South of Cherbourgh
I added plaster to all the bases to hide the cast on bases of the models.
I then started to remove the flash on the Americans, and noticed the quite long machine gunners. Fitting them to the washer size I put the Wehrmacht support teams on, they were to long. So I needed bigger ones.
On these, the lying models fit. Bigger diameter on a washer also means bigger height, they are 2-3 times as thick as the washers the other models are based on. When the bases are painted and have static grass added, this is hopefully not optically disturbing.
As I want all my support teams on the same size of base across the nations (makes it visually more pleasing in my mind, and helps in quickly identifying the type of model during a game), the German teams needed to be re-based. Good that I thought of that before applying the plaster... But plaster and PVA glue are easily removed with a knife from the metal washers.
The bigger washer size also allows me to put all the five crew models on the same base. This is more consistent concerning casualty removal as well. With the smaller size base I would have had two models on the base and three on individual bases; the first three casualties would have been removed with the single based models, the second to last with a marker on the base... With all models on the base, all casualties are shown with a marker on the base. For this I plan to put a frame on the base, where a micro dice fits in. Also, all models on one base is visually more pleasing and allows me to create small mini dioramas. Need some ammo crates...
While reading more of the rules in detail, I read the section on Big Men again. Then I wondered, how to mark the individual Big Men on the table, and how to easily distinguish the Levels during a game. So far I also just based the models individually on the same size of washer as all the common men. Could be difficult to spot during game play... So I removed some more models from their plastered bases (really should have thought of that before), now the plan is to base each Big Man with an additional number of men to get a number of models equal to his Level on a larger sized washer. The larger sized washer makes them more easily discriminable from the ordinary troopers, the number of models shows the Level quite easily. The following pictures show a Big Men with the maximum Level of IV the rules allow, a bit cramped but still works. As most Big Men are Level II or III the space is more than enough.
To distinguish the different Big Men and to allocate them to a distinct card in the Game Deck, I will glue small stones to the bases and paint on them a letter which can be seen from the rear (so normally for the owning player) and make cards which say "Allied Big Man A".
Here is the whole Kampfgruppe grouped by squad, the models in the upper right are spares. The Big Men models (I am short some, need to order some more riflemen after having decided to have the Level represented by the number of models on the base) and the support teams (again, I need some more models to get all the crews up to five) are glued to the wood strips for ease of painting, five models on base around a mortar would have made some areas on the models unreachable with a brush. The pile of plaster in the front is from the bases where I dismounted the gun crews and Big Men models.
Ready to be rinsed in warm soapy water and then base coated.
Published 2014-07-13 00:23:00
15mm | 1940's | IABSM3 | Peter Pig Miniatures | Too Fat Lardies | US Army | Wehrmacht | WWII
All posts for this project: newest first | oldest first.
2 0 1 4 - 0 7 - 0 8
[15mm IABSM]
South of Cherbourgh
All the Wehrmacht models are freed of flash and glued to their bases. For the bases I used washers; on one side for the extra heft, on the other to allow magnetic storing. All models are based individually, with the exception of the radio operators that come cast as pairs, and with the exceptions of the mortars and tripod mounted MG 42s, which are based as two man teams on a larger washer. The rest of the crews is singly based to be placed alongside.
Published 2014-07-08 23:44:00
15mm | 1940's | IABSM3 | Peter Pig Miniatures | Too Fat Lardies | US Army | Wehrmacht | WWII
All posts for this project: newest first | oldest first.
2 0 1 4 - 0 7 - 0 6
[15mm IABSM]
South of Cherbourgh
Having seen a WWII movie recently, my interest in that period got revitalized - what a surprise... shouldn't watch any movie that gives you wargaming ideas...
After watching the movie I browsed the web a bit, you know just for fun, not looking for any specific stuff I might buy... seriously. I came across a very positive review of I Ain't Been Shot Mum version 3, and thought (after verifying what was said there with other online reviews), well, just buying a PDF rule book is not bad, one can never have enough rules... What I read I liked... And Scenario number two (South of Cherbourgh) didn't need much figures also... Peter Pig has nice ones I always wanted to have, right? Oh look, it isn't even that expensive all in all... I ordered last Monday, and yesterday the parcel arrived - great service!
As this is just meant as a small side project, I am sure it will not take long to complete... you know...
Published 2014-07-06 22:55:00
15mm | 1940's | IABSM3 | Peter Pig Miniatures | Too Fat Lardies | US Army | Wehrmacht | WWII
All posts for this project: newest first | oldest first.


