2 0 1 4 - 0 8 - 1 0
[6mm]
A gaming board in a weekend
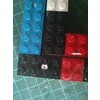
The buildings were base coated in grey, then the lower half was sprayed white in preparation of the yellow coat that followed. After the yellow was dry, I placed a 1mm tape strip around the building, and then sprayed a dark brown coat over it. This was then covered by a 2mm tape strip, placed (theoretically) centrally on the 1mm strip. Then the building was sprayed in a sand colour, and received two drybrushs.
Then it was time to remove the tape strips... drumroll...
Well, the two buildings on the left turned out as intended, with the two buildings on the left I did not place the strips correctly... :-(
The board was drybrushed in the base colour, then in sand and finally in white.
The hills were painted in anthracite grey, then drybrushed in a brown grey and finally in white. The sand areas were painted the same way as the board.
Published 2014-08-10 16:49:00
6mm | Airbrush | SiFi | Space Marines | Stargrunt 40.000 - Rogue Rules | Terrain
All posts for this project: newest first | oldest first.
[6mm]
A gaming board in a weekend
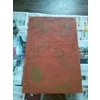
The board received a wash of dark brown, then green in patches.
The hill the Marines need to defend is occupied by 4 buildings the Squats need to blow up. I placed them in a way, that the engineers can move from building to building by using two actions, so one whole turn. They can also chance however, making a combat move (rolling 2D4) and hope to cover the distance in one action, leaving them one action to start preparing the charges.
The hills all consist of three layers of cork floor tiles glued together. I then used pliers to break of the edges, thus creating a rough and uneven cliff face.
Finally, the hills got some areas coverd in sand as well. On the large hill, the sand forms right angles around at least one corner of each building, so that I know exactly where to place them for each game.
Published 2014-08-10 12:08:00
6mm | SiFi | Space Marines | Stargrunt 40.000 - Rogue Rules | Terrain
All posts for this project: newest first | oldest first.
2 0 1 4 - 0 8 - 0 9
[6mm]
A gaming board in a weekend
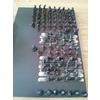
I painted these models quite some time ago, but so far never used them in a game.
Now a new colleague who learnt about my hobby asked for a game during lunch break, so I thought again of these small models, which would need a smaller game board.
Only problem: I neither have a board nor any terrain...
The above models I painted according to the scenario description of Ork Hill. So it will be this scenario I have time to build terrain for this weekend... You grow with your challenges...
Here you can see my interpretation of the terrain description from the scenario:
So I need two hills, four buildings and the board. The woods will be brown felt areas with aquarium plants I already have (probably too large, but ready) and for the river/marsh I will use blue felt. So I hope the building and painting can be accomplished this weekend.
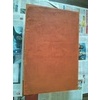
First, the board. It is 50751.2cm MDF. It got coated with PVA and sprinkled with bird cage sand. I then painted it in orange brown.
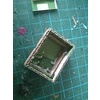
The buildings I designed on the computer, printed them and glued the prints to corrugated card board. I the cut the windows before cutting the walls. For gluing, I used Lego blocks to get nice 90° corners. There is a floor, inner walls that close the windows from the inside and serve as pillars for the roof and finally the roof. As I don't like 'unlogical' terrain, I needed an access to the roof. So I cut squares from card board, cut away the edges and glued them onto the roof as hatches. When dry, I covered the buildings in ready made wall spackle.
Published 2014-08-09 00:22:00
6mm | Games Workshop | Ground Zero Games | Orks | SiFi | Space Marines | Stargrunt 40.000 - Rogue Rules | Terrain
All posts for this project: newest first | oldest first.
2 0 1 4 - 0 7 - 2 8
[15mm IABSM]
South of Cherbourgh
I started with the Splinter pattern, by painting brown continuous shapes with as much edges as opposed to rounded with Vallejo 70.846 Managing.
Published 2014-07-28 23:04:00
15mm | 1940's | IABSM3 | Peter Pig Miniatures | Too Fat Lardies | Wehrmacht | WWII
All posts for this project: newest first | oldest first.
2 0 1 4 - 0 7 - 2 7
[15mm IABSM]
South of Cherbourgh
I painted the base of the German models in the basic brown colour I use on all my models. Usually I paint the base last, but I often smear paint on the boots of the minis, so I thought I would try out the reverse way; first paint the base, then carefully paint the boots. You can also see the models here on the mdf board covered with magnetic basing material which the washers adhere to. This board will then be glued into a cut down copy paper card box like the rest of my miniatures are stored in.
The models' unifroms were then drybrushed. Considering the fact that German uniform manufacturing was suffering more and more from shortages which resulted in quite different batches of uniforms towards the end of the war both in cloth and colour, I tried to replicate this with my models. I used three different colour mixes for drybrushing:
- 1/2 Vallejo 70.830 German Fieldgrey WWII + 1/2 Vallejo 70.885 Pastel Green
- 2/5 Vallejo 70.830 German Fieldgrey WWII + 2/5 Vallejo 70.920 German Uniform + 1/5 Vallejo 70.815 Basic Skintone
- 1/2 Vallejo 70.830 German Fieldgrey WWII + 1/2 Vallejo 70.919 Iraqui Sand
Well, I could have saved the effort. While the colours looked different in my painting pallette, the models in the end look all the same, especially when seen from a tabletop distance. Can you spot any differences?
I probably should have used different base colours with the same drybrush instead of the other way round.
Next, I started to work on the models wearing Zeltbahnen, so far only the base colour (Vallejo 70.885 Pastel Green) has been applied. I hope I will get the camouflage scheme to look right...
Published 2014-07-27 23:23:00
15mm | 1940's | IABSM3 | Peter Pig Miniatures | Too Fat Lardies | Wehrmacht | WWII
All posts for this project: newest first | oldest first.
2 0 1 4 - 0 7 - 2 0
[15mm IABSM]
North of Caen
The British are ready based. Had I paid more attention to the pictures of the Bren pack composition, I would have noticed that you only get three Brens per pack, the rest being ammo carriers/loaders... Therefore I am now some Brens short and have to many rifle men... this are the empty washers in the picture. Measures have already been taken to remedy this situation.
Published 2014-07-20 22:45:00
15mm | 1940's | British Army | IABSM3 | Peter Pig Miniatures | Too Fat Lardies | WWII
All posts for this project: newest first | oldest first.
[15mm IABSM]
South of Cherbourgh
The Wehrmacht troops were first given a basecoat with Vallejo Primer Black Acrylic-Polyurethane, then given a spray from ~40°+ with Valejo German Fieldgrey WWII. The angle also created the first shading, by leavig the downward areas black.
Published 2014-07-20 22:40:00
15mm | 1940's | Airbrush | IABSM3 | Peter Pig Miniatures | Too Fat Lardies | Wehrmacht | WWII
All posts for this project: newest first | oldest first.
[Airbrush]
Figure holder device
When airbrushing (especially base coating) my models, this is usually done in two steps.
- Take the miniature by the base and airbrush from the waist to the head. Let dry.
- Take the miniature by the head and airbrush from the waist down to the base.
So I need to touch every mini twice, and my hand usually is also black (or grey, or whatever) afterwards.
With my current 15mm WWII project, I have quite a lot of miniatures to base coat, so I thought of a better solution. Here is my clever contraption:
I bought a square wooden rod, some screws, and two metallic plates (whatever the technical term might be) as well as a couple of different sized magnets. I cut the rod to have 14cm either side of the 14cm wide plate, rounded the edges outside the width of the plate first with a rasp, then with two different grains of sanding paper, and screwed the plate in place.
Now I can place magnets on the plate fitting the size of washer a miniature is based on, grip the device on the sides and spray the miniatures without getting paint on my hands. I can also turn the miniature every which way to reach every undercut with the airbrush.
Published 2014-07-20 22:35:00
2 0 1 4 - 0 7 - 1 6
[15mm IABSM]
North of Caen
When I placed my order for South of Cherbourg, I also had a look at the Peter Pig buildings, but decided to first look around, as there must be a lot of suppliers for those. After some googleing, I didn't find many I liked, so another order with Peter Pig was needed. Along with the buildings, I also gave their hedges, low walls and hay stacks a go.
To enliven my terrain I added some sheep, pigs and dead cows - well, the latter ones don't actually enliven the terrain... Also, some street signs, furniture, petrol station pieces and an urinal was added to the order.
The models I ordered before (US Army and Wehrmacht) are for the second scenario from the rulebook. So I thought, the Lardies certainly had their reason for putting scenario one first... and I would not need anymore Germans, all covered already by the second scenario. Just some British soldiers...
Again, only one week from ordering to delivery, great service!
Published 2014-07-16 23:12:00
15mm | 1940's | British Army | IABSM3 | Peter Pig Miniatures | Too Fat Lardies | WWII
All posts for this project: newest first | oldest first.
2 0 1 4 - 0 7 - 1 5
[15mm IABSM]
South of Cherbourgh
All the single based Americans are ready based, the other models glued for painting.
Published 2014-07-15 23:51:00
15mm | 1940's | IABSM3 | Peter Pig Miniatures | Too Fat Lardies | US Army | WWII
All posts for this project: newest first | oldest first.


