2 0 1 4 - 1 0 - 0 6
[15mm IABSM]
North of Caen
After life was quite busy the last days, I found some more time to continue work on miniatures. I started to work on the missing bren gunners, when I noticed something strange about the base size of the British models I did so far:
I chose the wrong size of wahsers... facepalm
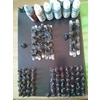
So before removing the flash from the new minitaures, I first debased the old ones. Here you can see them glued to the intended size of washer next to my mountain of stupidity...
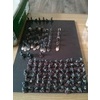
Here you can see the models including the 8 new ones organized into squads.
Published 2014-10-06 16:44:00
15mm | 1940's | British Army | IABSM3 | Peter Pig Miniatures | Too Fat Lardies | WWII
All posts for this project: newest first | oldest first.
2 0 1 4 - 0 8 - 3 0
[15mm IABSM]
South of Cherbourgh
All the models got their helmets painted in 70.995 German Grey.
I then sorted out some models, painted the helmets in 74.604 Dunkelgelb and then added random shapes in green and brown (splotches, lines, etc.) to create some "Normandy Helmets". I let the grey on the underside of the helmet as some sort of blacklining and also let it shine through the dunkelgelb here and there.
I then sorted out all the models which had greenery on their helmet, and painted it in 70.967 Olive Green. This is quite a harsh green, but a more subdued tone would not be discernible, especially from the Normandy Helmets.
Finally, the officer models got painted:
Now all the models are drying, after I sprayed them with gloss varnish. This is on the one hand to protect the paint job done so far, on the other hand the varnish will help the flowing of the washes.
Published 2014-08-30 22:55:00
15mm | 1940's | IABSM3 | Peter Pig Miniatures | Too Fat Lardies | Wehrmacht | WWII
All posts for this project: newest first | oldest first.
[15mm]
Corporate Marines
Having seen a news item on The Miniatures Page, I thought these would fit perfectly well for the door gunners of my VTOLs. So I ordered the gatlings and machine guns from Brigade Models:
Now I need to recreate them as 3 models in OpenSCAD and play around with them on my cabin model.
Published 2014-08-30 22:16:00
15mm | Brigade Models | OpenSCAD | SiFi
All posts for this project: newest first | oldest first.
2 0 1 4 - 0 8 - 2 6
[15mm IABSM]
South of Cherbourgh
I painted all the skin areas on all the models.
I then painted the ammunition belts on all the models. I used 70.801 Brass and 72.059 Hammered Copper for the shells/bullets, 70.821 German Camo Beige WWII for the belts themselves.
Published 2014-08-26 00:05:00
15mm | 1940's | IABSM3 | Peter Pig Miniatures | Too Fat Lardies | Wehrmacht | WWII
All posts for this project: newest first | oldest first.
2 0 1 4 - 0 8 - 2 4
[15mm IABSM]
South of Cherbourgh
I painted all the metal parts of the weapons on all the models.
In reality, the metal areas were mostly black, with only worn off edges showing 'real silver' metal. But painting the weapons black would have been too drab on the models. So I decided for 71.073 Gunmetal Metalizer, a very dark, blackish metal colour.
After the all the models are fully painted, I will add some washes; then the Gunmetal will receive a black wash probably.
Published 2014-08-24 22:40:00
15mm | 1940's | IABSM3 | Peter Pig Miniatures | Too Fat Lardies | Wehrmacht | WWII
All posts for this project: newest first | oldest first.
2 0 1 4 - 0 8 - 2 3
[15mm IABSM]
South of Cherbourgh
I painted all the wooden parts, spades and grenades in 70.876 Brown Sand, rifles in 70.940 Saddle Brown.
Next step is painting the metal parts.
Published 2014-08-23 21:48:00
15mm | 1940's | IABSM3 | Peter Pig Miniatures | Too Fat Lardies | Wehrmacht | WWII
All posts for this project: newest first | oldest first.
[15mm IABSM]
South of Cherbourgh
I painted the boots and the gaiters on all the models. For the boots I went roughly 50/50 with 70.994 Dark Grey and 70.879 Green Brown. The gaiters were also Field Grey according to the Osprey book I use as a reference, but that was not really visible on the models, so I went for 70.821 German Camo Beige.
Published 2014-08-23 16:59:00
15mm | 1940's | IABSM3 | Peter Pig Miniatures | Too Fat Lardies | Wehrmacht | WWII
All posts for this project: newest first | oldest first.
2 0 1 4 - 0 8 - 1 7
[15mm IABSM]
South of Cherbourgh
After some while another update. It is not that I did not continue on the models, it is just the fact, that with the Wehrmacht models every piece of equipment has another color... which is time consuming.
Here you can see the finished Zeltbahnen.
For all the leather straps and pouches, I first tried a dark grey (model on the right), but this is hardly discernible this close, there is no difference to the uniform from further away. So I went with black (left model).
This is the current status of all models: bread bag, canteen, gas mask/blanket canister, Zeltbahn, grenades, spades and mess kit painted, including all the straps. The wooden part of the Stielhandgranaten and spades are still missing.
Published 2014-08-17 23:42:00
15mm | 1940's | IABSM3 | Peter Pig Miniatures | Too Fat Lardies | Wehrmacht | WWII
All posts for this project: newest first | oldest first.
2 0 1 4 - 0 7 - 2 8
[15mm IABSM]
South of Cherbourgh
I started with the Splinter pattern, by painting brown continuous shapes with as much edges as opposed to rounded with Vallejo 70.846 Managing.
Published 2014-07-28 23:04:00
15mm | 1940's | IABSM3 | Peter Pig Miniatures | Too Fat Lardies | Wehrmacht | WWII
All posts for this project: newest first | oldest first.
2 0 1 4 - 0 7 - 2 7
[15mm IABSM]
South of Cherbourgh
I painted the base of the German models in the basic brown colour I use on all my models. Usually I paint the base last, but I often smear paint on the boots of the minis, so I thought I would try out the reverse way; first paint the base, then carefully paint the boots. You can also see the models here on the mdf board covered with magnetic basing material which the washers adhere to. This board will then be glued into a cut down copy paper card box like the rest of my miniatures are stored in.
The models' unifroms were then drybrushed. Considering the fact that German uniform manufacturing was suffering more and more from shortages which resulted in quite different batches of uniforms towards the end of the war both in cloth and colour, I tried to replicate this with my models. I used three different colour mixes for drybrushing:
- 1/2 Vallejo 70.830 German Fieldgrey WWII + 1/2 Vallejo 70.885 Pastel Green
- 2/5 Vallejo 70.830 German Fieldgrey WWII + 2/5 Vallejo 70.920 German Uniform + 1/5 Vallejo 70.815 Basic Skintone
- 1/2 Vallejo 70.830 German Fieldgrey WWII + 1/2 Vallejo 70.919 Iraqui Sand
Well, I could have saved the effort. While the colours looked different in my painting pallette, the models in the end look all the same, especially when seen from a tabletop distance. Can you spot any differences?
I probably should have used different base colours with the same drybrush instead of the other way round.
Next, I started to work on the models wearing Zeltbahnen, so far only the base colour (Vallejo 70.885 Pastel Green) has been applied. I hope I will get the camouflage scheme to look right...
Published 2014-07-27 23:23:00
15mm | 1940's | IABSM3 | Peter Pig Miniatures | Too Fat Lardies | Wehrmacht | WWII
All posts for this project: newest first | oldest first.


