2 0 1 3 - 1 2 - 2 8
[Dreadball]
Gaming Board
Okay, time to get some colours onto the board. The following were used:
First step was, to spray the metal colour.
The main areas of the board were then sprayed green grey.
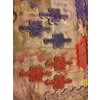
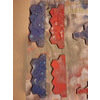
The team areas, the score counter, the scoring areas and the turn counter were painted in red and blue, one colour for each team.
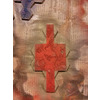
At this point I decided, that I wanted to break up the hexfield optic of the field. The scoring area was the first part where I applied this. From card I made a mask, and used it to show the scoring areas as a rectangular area.
The 'side add on' tiles were also given a straight edge in the field colour.
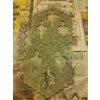
The board in its current stage.
When I looked at it, I decided that the playing area needs some lines to give it more structure and further 'de-hex' it.
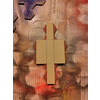
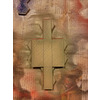
As a preparation step I cut two more masks from card.
I hope to be able to use them tomorrow.
Published 2013-12-28 23:14:00
28mm | Airbrush | Dreadball | Mantic Games | Weathering - Salt Method
All posts for this project: newest first | oldest first.
2 0 1 3 - 1 2 - 2 9
[Dreadball]
Gaming Board
Some lessons learnt. When using a masking material that is itself not transparent, the edge of the masking material should fit somewhere on a visible line on the model (like a row of hexes). With my card mask, it was a bit of guessing if I placed it correctly or not... As you can see, the lines are not always placed neatly...
Apart from that small detail, the process worked well. The salt was a bit of a hindrance, as the underground was not flat, and four hands were very helpful (thanks to my wife).
Next, the salt will be removed; the Dreadball league symbols, the entry point arrows and the referree starting field checkers need to be painted. Also the lines of the hexfields and the numbers on the counters need to be painted.
Published 2013-12-29 17:03:00
28mm | Airbrush | Dreadball | Mantic Games | Weathering - Salt Method
All posts for this project: newest first | oldest first.
2 0 1 3 - 1 2 - 3 0
[Warfork 40.000 - Rogue Rules]
Orks Marauders
Last five Orks for this year. 35 in total done.
Published 2013-12-30 23:25:00
28mm | Mantic Games | Orks | SiFi | Warfork 40.000 - Rogue Rules
All posts for this project: newest first | oldest first.
[SiFi]
Colonists and Vehicles
As a last step, I added some srcatches. First, I painted lines in orange mixed with white.
Next, I painted over the upper part of the light orange line with chocolate brown.
I call them done.
The Rangers are up next, I started by blacklining them with secret weapon washes heavy body black.
Published 2013-12-30 23:35:00
15mm | Ground Zero Games | SiFi
All posts for this project: newest first | oldest first.
2 0 1 3 - 1 2 - 3 1
[SiFi]
Colonists and Vehicles
Last post for this year. I painted the windows and highlighted the grey and blue body colours. At the moment the gloss varnish coat to protect the current status is drying.
Published 2013-12-31 16:09:00
15mm | Ground Zero Games | SiFi
All posts for this project: newest first | oldest first.
2 0 1 4 - 0 1 - 0 3
[SiFi]
Colonists and Vehicles
I finished the last two vehicles. They were painted like the first two (same colours for windows, tires, antennae, same chiping technique), just with blue/grey instead of orange.
Published 2014-01-03 23:26:00
15mm | Ground Zero Games | SiFi
All posts for this project: newest first | oldest first.
[2003]
Insurgents Technical
The technical is also done. Into the rust areas I stippled metall to represent fresher scratches. I painted the windows the same way as for the Humvees (after all, they will be chasing each other in the same environment). Need to get some crew members for the AA...
Speaking of the AA, I dd not glue it in place, its pin is deep enough to keep the weapon in place, if the model is turned upside down.
Published 2014-01-03 23:31:00
15mm | 2000's | Insurgents | Peter Pig Miniatures | Weathering - Salt Method
All posts for this project: newest first | oldest first.
2 0 1 4 - 0 1 - 0 5
[Dreadball]
Gaming Board
I started to paint the white lines - which sucks! First, I used my smallest brush with thinned down white, but kept overspilling paint outside the depressions. With even more thinned white it became easier, but the white did not cover properly.
Then I remembered when I put new tiles into our bathroom and added joint compound (I hope this is the right English term). You just poured it on, spread it out, then washed away the excess with a sponge and water (well, it was a bit more complicated, but this should suffice here).
So I tried to emulate this technique on my gaming board. I mixed white with water to a consistency of a bit thicker than milk and added a drop of washing liquid to break the surface tension of the mix. I generously applied it, then used paper tissue to wipe off the excess.
This worked quite well and quick.
I have a little mist of white here and there on the board, but this is hardly noticeable.
Published 2014-01-05 22:05:00
28mm | Dreadball | Mantic Games
All posts for this project: newest first | oldest first.
2 0 1 4 - 0 1 - 0 6
[Dreadball]
Gaming Board
I did the turn and score counter, I also did some WIP pics.
The white goo applied lliberally.
The white goo wiped away, leaving it only in the recesses,
Center tile with illuminated (the white glow in between) the hexes.
Published 2014-01-06 22:57:00
28mm | Dreadball | Mantic Games
All posts for this project: newest first | oldest first.
2 0 1 4 - 0 1 - 1 1
[SiFi]
More Vehicles
I received another delivery from Jon at Ground Zero Games (only about 5kg), and started right away on the first models.
With my last order I got some civilian trucks, which I intended for the colonists I already owned, but did not have any detailed plan for them. When I started to work on them, I painted them according to the two colour schemes I painted the colonists in; then dubbed them TecServ (technical services) and ConsServ (construction services). Having defined these themes, I immediately had more ideas for more vehicles I would need...
First is a transporter for all the construction workers to get them on site. I used the Colonial Rover line for ConServ, but a passenger cabin is only available with the Colonial Ranger line. As I also needed another Ranger this was no problem.
The passenger cabin on the right, the original cargo module on the right.
As the underbody of the Rover is longer than that of the Ranger, I need to fill the gap. I will try to do this in a way which implies a longer passenger cabin.
The Ranger the passenger cabin came from will be converted to a turntable ladder truck. The technicians need to get to higher installations like pylons, chimneys, etc. after all. After looking around, I finally ended up with a 1/87 scale die cast fire engine.
I cut up the Ranger underbody and prolonged it with card. From Depron and plastic card I created a platform, which will take the screw from the orignal model to fix the turntable ladder and allow it to be rotated (instead of gluing it in place). Still more detailing work to be done.
When I shopped for the fire engine, I also came across a mobile excavator and four wheel loader, which I thought to be a good addition to ConServ. The models will be mostly used as they are with a new paint job, only the wheels will be exchanged. I will try to build some wheels that look siminlar to those from the Rover line of trucks to tie them in.
The last vehicle is for the three medics I painted, a VTOL ambulance. I left the chin mounted gun turret off, and instead installed a search headlight (taken from the Rover truck).
Published 2014-01-11 22:54:00
15mm | Die Cast | Ground Zero Games | SiFi
All posts for this project: newest first | oldest first.


